Update: The Macs don’t have a built in sound system that will work with the screen recording function in Quicktime, so it may be necessary to download Soundflower or the equivalent to make the below instructions work.
If you still have trouble, I have found that Screenflick for Mac also works. You can just tell it to use the camera to film you, and can position your image top right and size it as you like, and then go into Powerpoint presenter mode as below, and it works the same way.
Here is a simple way to get your face filmed onscreen at the same time as your slides without fancy software. Everyone with a Mac can do this today. PC users just have to substitute their video program for Quicktime.
For faculty with Macs:
How to narrate your powerpoint slides while filming yourself from your desktop, using your computer’s built-in camera:
Open Quicktime Player
At control bar above, choose “File”
Click on “New Movie Recording”
Choose “View”
Click on “Float on top”
Still in Quicktime, choose “File”
Click on “New Screen Recording”
Resize your image to an eighth of the screen and position on right
Open Powerpoint presentation
Choose “slide show” and go into full screen mode
Move cursor to bottom left to display forward and backward onscreen options
Next to the “forward” arrow there is an icon of a computer screen
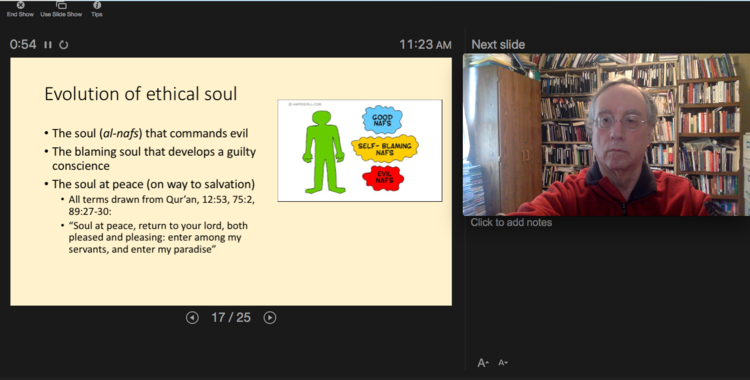
Click on this icon and choose “presenter view”
Position your own Quicktime video image to the right of the main slide, covering the small “next slide” window in “presenter view”
Move cursor over Quicktime screen and click on the red dot to begin recording.
Make your comments as you advance your slides
When your presentation is finished, move your cursor to the Quicktime screen and click on the red dot to stop recording.
Go to “File” in Quicktime
Save your filmed presentation to a convenient folder.
You can upload your video to Canvas or other teaching software at the “File” tab; you can also create a YouTube channel for yourself and upload the Quicktime file in .mov format there.
To make sure viewers with pc’s can easily watch your video, it might be worthwhile instead saving it as an .mp4, using a conversion program such as Wondershare video converter.


 © 2026 All Rights Reserved